
Sometimes, it just seems silly getting a full-size ironing board out just for pressing a couple of seams. Well, this table is so small it can sit permanently by my sewing table. I like that. Now maybe I need a spare iron to sit there permanently too, so the man of the house doesn't get annoyed because I've left it in my sewing room yet again when he wants to do the ironing.
Yes, you read that right, he does all the ironing in our house. No, I don't hire him out, sorry about that.
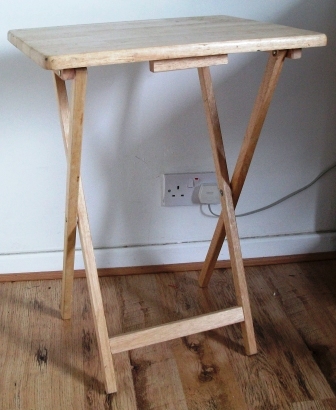
I started with one of these TV dinner tables. I used to use them at craft fairs but don't really need them for that purpose any more. If you need to buy one for this project, they're usually quite cheap. Mine came from Dunelm Mill and was about £6.00 but I know a lot of people have got one of these in a neglected corner gathering dust.
You'll also need:
- a piece of thermal wadding (batting)
- fleece or cotton wadding if you want a bit more padding
- heavy duty cotton fabric - furnishing (home dec) weight
- staple gun

Cut a piece of thermal wadding the same size as the table top. To add a bit more padding, I popped a layer of fleece under the thermal wadding. Thermal wadding has some heat protection, so should protect your table top at least somewhat. You could cut it larger and wrap it round (gives it a more padded look at the edges) but I thought this was a bit of a waste of something I need for other projects!
Then cut a piece of heavy-duty cotton furnishing fabric, large enough to wrap around the table top and go underneath. Furnishing weight cotton is a good fabric to use as it will stand a hot iron. If you want a neat finish, you can use pinking shears - I didn't bother.

Lay the fabrics out on the floor in reverse order (top fabric on the bottom)

Place the table on the top

Wrap the fabric around the table (work from opposite edges in turn, so you can stretch the fabric lightly across the table top) and staple it in place at intervals on the bottom edges of the table.


Work carefully around the corners, folding under to get a neat finish.

Turn the table over and - ta-dah!! - you have a cute little ironing table for your sewing room! If you don't have room for it to stand there permanently, it is easily foldable and takes up almost no room at all.